
▼ What ?
커리큘럼 4주차에선 답변을 등록하고 보여주는 기능을 구현해보는 시간을 가졌다. 일단, HTML을 이용해 답변 생성 버튼을 만들어주며 답변 내용을 표시해주고, 답변 버튼을 누르면 답변이 저장되도록 구현(Controller, Service)해주었다. 그리고 화면에 디자인을 적용시키기 위해 스타일시트(css)를 직접 구현해보고, 직접 구현하지 않아도 "Bootstrap"이라는 오픈소스 프레임워크를 이용해 디자인을 적용시키는 과정에 대해서도 알아보았다. 또한, css 파일 이름이 변경되거나 새로운 css 파일이 추가될 때마다 모든 템플릿 파일을 일일이 수정되는 수고를 덜기 위해서, 기본 틀이 되는 템플릿을 통해 Thymeleaf에서 제공해주는 템플릿 상속 기능을 활용해봤다. 마지막으로, 답변을 등록하는 기능을 구현했듯이 질문을 등록할 수 있도록 구현해주고, 답변이나 질문을 등록할 때 빈 내용도 등록되는 경우를 방지하기 위해 오류를 표시하는 기능을 추가적으로 구현해주었다. 후자의 기능처럼 자주 사용될 만한 템플릿 코드는 공통 템플릿으로 만들어 필요할 때마다 삽입하여 사용할 수 있도록 하는 방식에 대해서도 배웠다.
▼ 답변 등록 & 표시
답변 등록
- 답변 등록 버튼 생성 - HTML
[ /web-board/src/main/resources/templates/question_detail.html ]
➜ "답변등록" 버튼을 누르면 POST 방식으로 "/answer/create<질문id>" URL이 호출된다.
( 전송되는 form의 action은 Thymeleaf의 "th:action" 속성으로 생성 )
...
<form th:action="@{|/answer/create/${question.id}|}" method="post">
    <textarea name="content" id="content" rows="15"></textarea>
    <input type="submit" value="답변등록">
</form>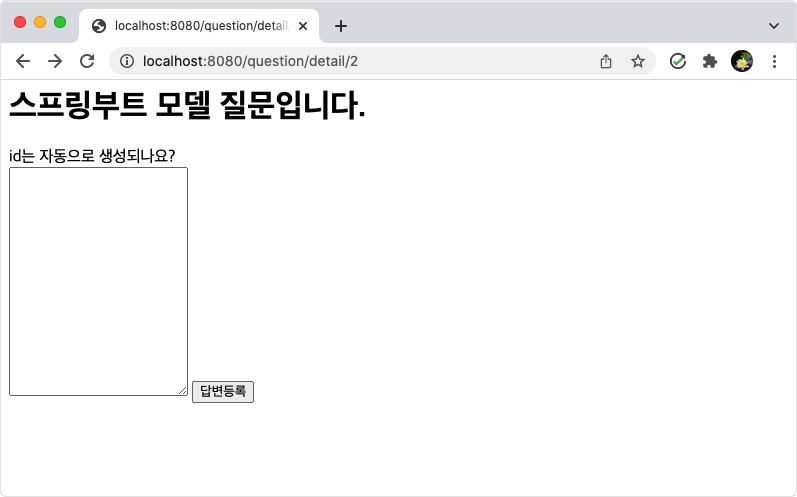
🔻 하지만, 해당 URL에 대한 매핑 처리를 안해두었기 때문에 버튼을 누르면 404 에러가 발생 !
( textarea의 name 속성("content")를 기억해두자 )
➜ 답변에 대한 Controller 클래스를 생성하자 !
- 답변 컨트롤러 생성
➜ .../webboard/answer/AnswerController.java
@PostMapping("/create/{id}")
➜ "/answer/create/{id}" 와 같은 URL 요청시 createAnswer 메서드가 호출된다.
@RequestParam String content
➜ 템플릿(template)에서 답변으로 입력한 내용(content)을 얻기 위해 추가된 것이다.
( 템플릿의 답변 내용에 해당하는 textarea의 name 속성명이 content이기 때문에 변수명을 content를 사용하지 않으면 오류 발생 ! )
package com.gdsc.webboard.answer;

import com.gdsc.webboard.question.Question;
import com.gdsc.webboard.question.QuestionService;
import lombok.RequiredArgsConstructor;
import org.springframework.stereotype.Controller;
import org.springframework.ui.Model;
import org.springframework.web.bind.annotation.PathVariable;
import org.springframework.web.bind.annotation.PostMapping;
import org.springframework.web.bind.annotation.RequestMapping;
import org.springframework.web.bind.annotation.RequestParam;

@RequestMapping("/answer")
@RequiredArgsConstructor
@Controller
public class AnswerController {

    private final QuestionService questionService;

    @PostMapping("/create/{id}")
    public String createAnswer(Model model, @PathVariable("id") Integer id, @RequestParam String content) {
        Question question = this.questionService.getQuestion(id);
        // TODO: 답변을 저장한다.
        return String.format("redirect:/question/detail/%s", id);
    }
}🔻 답변을 등록한 후 저장되는 기능을 구현하기 위해선 답변 데이터를 처리하기 위한 답변에 대한 Service 클래스가 필요하다 !
답변 저장
- 답변 서비스 생성
[ .../webboard/answer/AnswerService.java ]
create 메서드
➜ 입력으로 받은 question와 content를 사용하여 Answer 객체를 생성하여 저장한다.
package com.gdsc.webboard.answer;

import com.gdsc.webboard.question.Question;
import lombok.RequiredArgsConstructor;
import org.springframework.stereotype.Service;

import java.time.LocalDateTime;

@RequiredArgsConstructor
@Service
public class AnswerService {

    private final AnswerRepository answerRepository;


    public void create(Question question, String content) {
        Answer answer = new Answer();
        answer.setContent(content);
        answer.setCreateDate(LocalDateTime.now());
        answer.setQuestion(question);
        this.answerRepository.save(answer);
    }
}🔻 이렇게 만든 create 메서드는 Controller 클래스에서 사용 !
- 답변 컨트롤러 수정
[ .../webboard/answer/AnswerController.java ]
➜ AnswerService의 create 메서드를 호출하여 답변을 저장 가능하다.
...
public class AnswerController {

    private final QuestionService questionService;
    private final AnswerService answerService;

    @PostMapping("/create/{id}")
    public String createAnswer(Model model, @PathVariable("id") Integer id, @RequestParam String content) {
        Question question = this.questionService.getQuestion(id);
        this.answerService.create(question, content);
        return String.format("redirect:/question/detail/%s", id);
    }
}🔻 답변을 등록해도 화면에 등록한 답변이 출력 X
➜ 등록한 답변을 템플릿에 표시하는 기능을 추가하지 않았기 때문이다 !
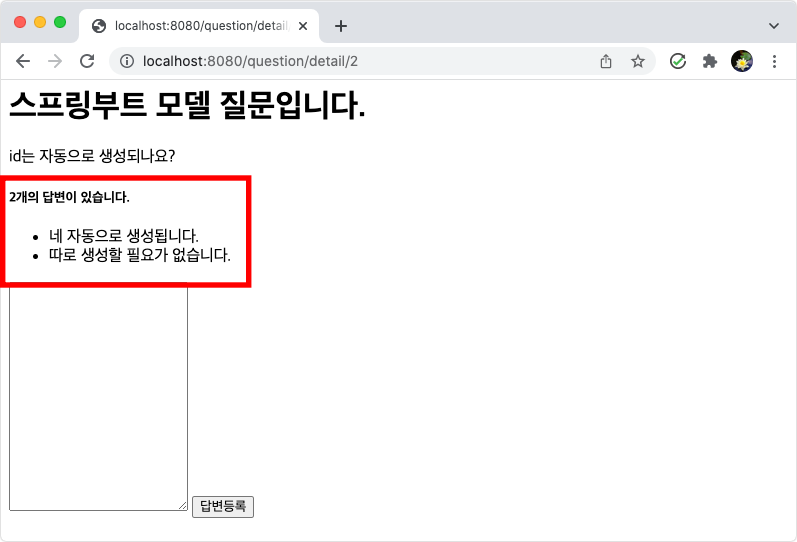
답변 표시
- 질문 상세 템플릿 수정
[ .../resources/templates/question_detail.html ]
➜ 답변은 등록된 질문 밑에 보여야 하기 때문이다 !
...
<h5 th:text="|${#lists.size(question.answerList)}개의 답변이 있습니다.|"></h5>
<div>
    <ul>
        <li th:each="answer : ${question.answerList}" th:text="${answer.content}"></li>
    </ul>
</div>
...🔻 "th:each" 기능은 자바의 foreach 메서드와 유사하다.
➜ Question 객체의 answerList를 반복 조회하여 <li>로 표시한다.
🔻 #lists.size(Iterable 객체)
➜ Thymeleaf가 제공하는 유틸리티로 객체의 길이를 반환한다.
▼ 스태틱(static) 디렉터리 & 스타일시트(css)
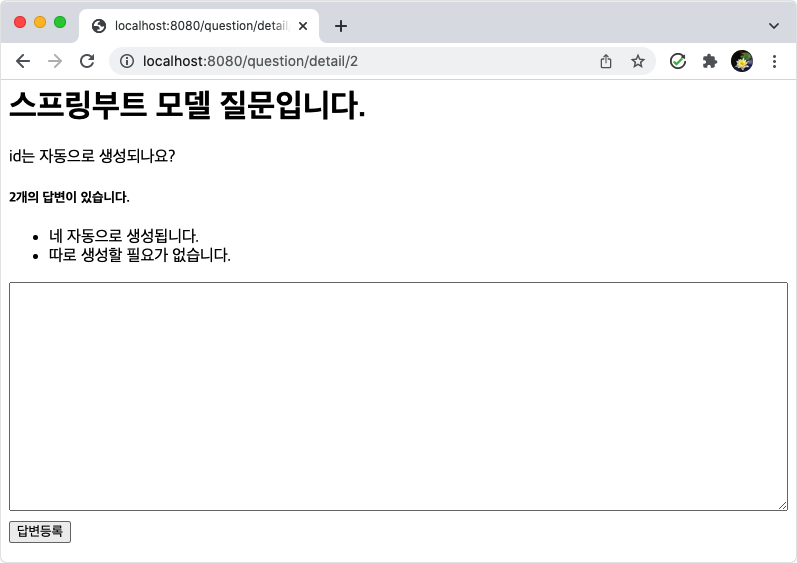
스타일시트 (css)
- 스타일시트 파일은 스프링 부트의 스태틱(static) 디렉터리에 저장해야 한다 !
➜ /web-board/src/main/resources/static/style.css
( 텍스트 창의 넓이 - 100%, 답변 버튼 상단에 10 픽셀의 마진 설정 )
textarea {
    width:100%;
}

input[type=submit] {
    margin-top:10px;
}
- 질문 상세 템플릿에 스타일시트 파일을 적용하자.
[ /web-board/src/main/resources/templates/question_detail.html ]
( 상단에 style.css를 사용할 수 있는 링크 추가 )
<link rel="stylesheet" type="text/css" th:href="@{/style.css}">
...🔻 static 디렉터리가 스태틱 파일들의 루트 디렉터리이기 때문에 "/static/style.css"로 사용해선 안된다 !
- 적용 이후 화면
▼ 부트스트랩 (Bootstrap)
부트스트랩 (Bootstrap) ?
- 디자이너의 도움 없이도 개발자 혼자서 괜찮은 수준의 웹 페이지를 만들 수 있게 도와주는 프레임워크이다 !
- [.../css/bootstrap.min.css] 를 아래 경로로 복사.
➜ /web-board/src/main/resources/static/bootstrap.min.css
부트스트랩 적용
- 질문 목록을 출력할 때 부트스트랩을 적용시키고 싶다면?
질문 목록 템플릿 수정
[ .../resources/templates/question_list.html ]
➜ "bootstrap.min.css" 스타일시트를 사용할 수 있도록 상단에 링크 추가.
<link rel="stylesheet" type="text/css" th:href="@{/bootstrap.min.css}">
<div class="container my-3">
    <table class="table">
        <thead class="table-dark">
            <tr>
                <th>번호</th>
                <th>제목</th>
                <th>작성일시</th>
            </tr>
        </thead>
        <tbody>
            <tr th:each="question, loop : ${questionList}">
                <td th:text="${loop.count}"></td>
                <td>
                    <a th:href="@{|/question/detail/${question.id}|}" th:text="${question.subject}"></a>
                </td>
                <td th:text="${#temporals.format(question.createDate, 'yyyy-MM-dd HH:mm')}"></td>
            </tr>
        </tbody>
    </table>
</div>🔻 loop.count
➜ 테이블 항목으로 추가한 번호를 표기.
🔻 #temporals.format
➜ Tymeleaf의 유틸리티로, 날짜를 형식에 맞춰 출력.
부트스트랩 참고 자료 - Get started with Bootstrap · Bootstrap v5.2 (getbootstrap.com)
Get started with Bootstrap
Bootstrap is a powerful, feature-packed frontend toolkit. Build anything—from prototype to production—in minutes.
getbootstrap.com
- 질문 상세 페이지도 부트스트랩을 적용하고 싶다면?
질문 상세 템플릿 수정
[ .../resources/templates/question_detail.html ]
<link rel="stylesheet" type="text/css" th:href="@{/bootstrap.min.css}">
<div class="container my-3">
    <!-- 질문 -->
    <h2 class="border-bottom py-2" th:text="${question.subject}"></h2>
    <div class="card my-3">
        <div class="card-body">
            <div class="card-text" style="white-space: pre-line;" th:text="${question.content}"></div>
            <div class="d-flex justify-content-end">
                <div class="badge bg-light text-dark p-2 text-start">
                    <div th:text="${#temporals.format(question.createDate, 'yyyy-MM-dd HH:mm')}"></div>
                </div>
            </div>
        </div>
    </div>
    <!-- 답변의 갯수 표시 -->
    <h5 class="border-bottom my-3 py-2"
        th:text="|${#lists.size(question.answerList)}개의 답변이 있습니다.|"></h5>
    <!-- 답변 반복 시작 -->
    <div class="card my-3" th:each="answer : ${question.answerList}">
        <div class="card-body">
            <div class="card-text" style="white-space: pre-line;" th:text="${answer.content}"></div>
            <div class="d-flex justify-content-end">
                <div class="badge bg-light text-dark p-2 text-start">
                    <div th:text="${#temporals.format(answer.createDate, 'yyyy-MM-dd HH:mm')}"></div>
                </div>
            </div>
        </div>
    </div>
    <!-- 답변 반복 끝  -->
    <!-- 답변 작성 -->
    <form th:action="@{|/answer/create/${question.id}|}" method="post" class="my-3">
        <textarea name="content" id="content" rows="10" class="form-control"></textarea>
        <input type="submit" value="답변등록" class="btn btn-primary my-2">
    </form>
</div>🔻 질문이나 답변은 하나의 뭉치에 해당하므로 부트스트랩의 card 컴포넌트를 사용.
- 부트스트랩 적용으로 인해 style.css는 필요가 없어졌으므로 기존 내용은 모두 삭제하자.
- 부트스트랩을 적용한 질문 상세 화면
- 부트스트랩 클래스 설명
▼ 템플릿(Template) 상속
표준 HTML 구조
- 어떤 웹 브라우저를 사용하더라도 웹 페이지가 동일하게 보이고 정상적으로 작동 하게 하려면 반드시 웹 표준을 지키는 HTML 문서를 작성해야 한다 !
( 앞서 작성한 템플릿들은 표준 HTML 구조 X ) - 표준 HTML 문서의 구조는 아래의 예시 코드처럼 html, head, body 엘리먼트가 있어야 하며, CSS 파일은 head 엘리먼트 안에 링크 되어야 한다 !
또한 head 엘리먼트 안에는 meta, title 엘리먼트 등이 포함되어야 한다 !
<!doctype html>
<html lang="ko">
<head>
    <!-- Required meta tags -->
    <meta charset="utf-8">
    <meta name="viewport" content="width=device-width, initial-scale=1, shrink-to-fit=no">
    <!-- Bootstrap CSS -->
    <link rel="stylesheet" type="text/css" th:href="@{/bootstrap.min.css}">
    <!-- sbb CSS -->
    <link rel="stylesheet" type="text/css" th:href="@{/style.css}">
    <title>Hello, sbb!</title>
</head>
<body>
...
</body>
</html>
- 태그? 엘리먼트?
<table> ... </table> <!-- table 엘리먼트 -->
🔻 "<table>" 은 table 태그이고, 이러한 table 태그로 시작해서 table 태그로 닫힌 구간(Block)은 table 엘리먼트이다 !
템플릿 상속
- 앞에서 작성한 질문 목록, 질문 상세 템플릿을 표준 HTML 구조가 되도록 수정해야 하는데, 모두 그렇게 변경하면 body 엘리먼트 바깥 부분(head 엘리먼트 등)은 모두 같은 내용으로 중복된다 !
➜ CSS 파일이 수정될 때마다 모든 템플릿 파일을 수정해야 하는 문제 발생.
➜ 이것을 해결하기 위해 타임리프(Thymeleaf)는 템플릿 상속 기능을 제공 !
( 기본 틀이 되는 템플릿을 다른 템플릿에서 상속해 사용하는 방식 )
- 표준 HTML 구조의 기본 틀 - layout.html
[ /web-board/src/main/resources/templates/layout.html ]
<th:block layout:fragment="content"></th:block>
➜ "layout.html" 을 상속한 템플릿에서 개별적으로 구현해야 하는 영역
( 이 부분만 구현하면 표준 HTML 문서가 되는 것 ! )
<!doctype html>
<html lang="ko">
<head>
    <!-- Required meta tags -->
    <meta charset="utf-8">
    <meta name="viewport" content="width=device-width, initial-scale=1, shrink-to-fit=no">
    <!-- Bootstrap CSS -->
    <link rel="stylesheet" type="text/css" th:href="@{/bootstrap.min.css}">
    <!-- sbb CSS -->
    <link rel="stylesheet" type="text/css" th:href="@{/style.css}">
    <title>Hello, sbb!</title>
</head>
<body>
<!-- 기본 템플릿 안에 삽입될 내용 Start -->
<th:block layout:fragment="content"></th:block>
<!-- 기본 템플릿 안에 삽입될 내용 End -->
</body>
</html>
- "layout.html" 을 상속할 템플릿 - question_list.html, question_detail.html
( question_detail.html도 같은 방법으로 수정 )
[ /web-board/ src/main/resources/templates/question_list.html ]<link rel="stylesheet" type="text/css" th:href="@{/bootstrap.min.css}">
➜ 부모 템플릿인 layout.html 템플릿에서 이미 링크하고 있기 때문에 삭제.
<html layout:decorate="~{layout}">
➜ layout.hml 템플릿 상속
<html layout:decorate="~{layout}">
<div layout:fragment="content" class="container my-3">
    <table class="table">
        ...
    </table>
</div>
</html>🔻 layout:decorate 속성
➜ 템플릿의 레이아웃(부모 템플릿)으로 사용할 템플릿을 설정.
🔻 layout:fragment="content"
➜ 부모 템플릿의 th:block 엘리먼트의 내용이 자식 템플릿의 div 엘리먼트의 내용으로 교체 !
▼ What ?
커리큘럼 4주차에선 답변을 등록하고 보여주는 기능을 구현해보는 시간을 가졌다. 일단, HTML을 이용해 답변 생성 버튼을 만들어주며 답변 내용을 표시해주고, 답변 버튼을 누르면 답변이 저장되도록 구현(Controller, Service)해주었다. 그리고 화면에 디자인을 적용시키기 위해 스타일시트(css)를 직접 구현해보고, 직접 구현하지 않아도 "Bootstrap"이라는 오픈소스 프레임워크를 이용해 디자인을 적용시키는 과정에 대해서도 알아보았다. 또한, css 파일 이름이 변경되거나 새로운 css 파일이 추가될 때마다 모든 템플릿 파일을 일일이 수정되는 수고를 덜기 위해서, 기본 틀이 되는 템플릿을 통해 Thymeleaf에서 제공해주는 템플릿 상속 기능을 활용해봤다. 마지막으로, 답변을 등록하는 기능을 구현했듯이 질문을 등록할 수 있도록 구현해주고, 답변이나 질문을 등록할 때 빈 내용도 등록되는 경우를 방지하기 위해 오류를 표시하는 기능을 추가적으로 구현해주었다. 후자의 기능처럼 자주 사용될 만한 템플릿 코드는 공통 템플릿으로 만들어 필요할 때마다 삽입하여 사용할 수 있도록 하는 방식에 대해서도 배웠다.
▼ 답변 등록 & 표시
답변 등록
- 답변 등록 버튼 생성 - HTML
[ /web-board/src/main/resources/templates/question_detail.html ]
➜ "답변등록" 버튼을 누르면 POST 방식으로 "/answer/create<질문id>" URL이 호출된다.
( 전송되는 form의 action은 Thymeleaf의 "th:action" 속성으로 생성 )
...
<form th:action="@{|/answer/create/${question.id}|}" method="post">
    <textarea name="content" id="content" rows="15"></textarea>
    <input type="submit" value="답변등록">
</form>
🔻 하지만, 해당 URL에 대한 매핑 처리를 안해두었기 때문에 버튼을 누르면 404 에러가 발생 !
( textarea의 name 속성("content")를 기억해두자 )
➜ 답변에 대한 Controller 클래스를 생성하자 !
- 답변 컨트롤러 생성
➜ .../webboard/answer/AnswerController.java
@PostMapping("/create/{id}")
➜ "/answer/create/{id}" 와 같은 URL 요청시 createAnswer 메서드가 호출된다.
@RequestParam String content
➜ 템플릿(template)에서 답변으로 입력한 내용(content)을 얻기 위해 추가된 것이다.
( 템플릿의 답변 내용에 해당하는 textarea의 name 속성명이 content이기 때문에 변수명을 content를 사용하지 않으면 오류 발생 ! )
package com.gdsc.webboard.answer;

import com.gdsc.webboard.question.Question;
import com.gdsc.webboard.question.QuestionService;
import lombok.RequiredArgsConstructor;
import org.springframework.stereotype.Controller;
import org.springframework.ui.Model;
import org.springframework.web.bind.annotation.PathVariable;
import org.springframework.web.bind.annotation.PostMapping;
import org.springframework.web.bind.annotation.RequestMapping;
import org.springframework.web.bind.annotation.RequestParam;

@RequestMapping("/answer")
@RequiredArgsConstructor
@Controller
public class AnswerController {

    private final QuestionService questionService;

    @PostMapping("/create/{id}")
    public String createAnswer(Model model, @PathVariable("id") Integer id, @RequestParam String content) {
        Question question = this.questionService.getQuestion(id);
        // TODO: 답변을 저장한다.
        return String.format("redirect:/question/detail/%s", id);
    }
}
🔻 답변을 등록한 후 저장되는 기능을 구현하기 위해선 답변 데이터를 처리하기 위한 답변에 대한 Service 클래스가 필요하다 !
답변 저장
- 답변 서비스 생성
[ .../webboard/answer/AnswerService.java ]
create 메서드
➜ 입력으로 받은 question와 content를 사용하여 Answer 객체를 생성하여 저장한다.
package com.gdsc.webboard.answer;

import com.gdsc.webboard.question.Question;
import lombok.RequiredArgsConstructor;
import org.springframework.stereotype.Service;

import java.time.LocalDateTime;

@RequiredArgsConstructor
@Service
public class AnswerService {

    private final AnswerRepository answerRepository;


    public void create(Question question, String content) {
        Answer answer = new Answer();
        answer.setContent(content);
        answer.setCreateDate(LocalDateTime.now());
        answer.setQuestion(question);
        this.answerRepository.save(answer);
    }
}
🔻 이렇게 만든 create 메서드는 Controller 클래스에서 사용 !
- 답변 컨트롤러 수정
[ .../webboard/answer/AnswerController.java ]
➜ AnswerService의 create 메서드를 호출하여 답변을 저장 가능하다.
...
public class AnswerController {

    private final QuestionService questionService;
    private final AnswerService answerService;

    @PostMapping("/create/{id}")
    public String createAnswer(Model model, @PathVariable("id") Integer id, @RequestParam String content) {
        Question question = this.questionService.getQuestion(id);
        this.answerService.create(question, content);
        return String.format("redirect:/question/detail/%s", id);
    }
}
🔻 답변을 등록해도 화면에 등록한 답변이 출력 X
➜ 등록한 답변을 템플릿에 표시하는 기능을 추가하지 않았기 때문이다 !
답변 표시
- 질문 상세 템플릿 수정
[ .../resources/templates/question_detail.html ]
➜ 답변은 등록된 질문 밑에 보여야 하기 때문이다 !
...
<h5 th:text="|${#lists.size(question.answerList)}개의 답변이 있습니다.|"></h5>
<div>
    <ul>
        <li th:each="answer : ${question.answerList}" th:text="${answer.content}"></li>
    </ul>
</div>
...
🔻 "th:each" 기능은 자바의 foreach 메서드와 유사하다.
➜ Question 객체의 answerList를 반복 조회하여 <li>로 표시한다.
🔻 #lists.size(Iterable 객체)
➜ Thymeleaf가 제공하는 유틸리티로 객체의 길이를 반환한다.
▼ 스태틱(static) 디렉터리 & 스타일시트(css)
스타일시트 (css)
- 스타일시트 파일은 스프링 부트의 스태틱(static) 디렉터리에 저장해야 한다 !
➜ /web-board/src/main/resources/static/style.css
( 텍스트 창의 넓이 - 100%, 답변 버튼 상단에 10 픽셀의 마진 설정 )
textarea {
    width:100%;
}

input[type=submit] {
    margin-top:10px;
}
- 질문 상세 템플릿에 스타일시트 파일을 적용하자.
[ /web-board/src/main/resources/templates/question_detail.html ]
( 상단에 style.css를 사용할 수 있는 링크 추가 )
<link rel="stylesheet" type="text/css" th:href="@{/style.css}">
...
🔻 static 디렉터리가 스태틱 파일들의 루트 디렉터리이기 때문에 "/static/style.css"로 사용해선 안된다 !
- 적용 이후 화면
▼ 부트스트랩 (Bootstrap)
부트스트랩 (Bootstrap) ?
- 디자이너의 도움 없이도 개발자 혼자서 괜찮은 수준의 웹 페이지를 만들 수 있게 도와주는 프레임워크이다 !
- [.../css/bootstrap.min.css] 를 아래 경로로 복사.
➜ /web-board/src/main/resources/static/bootstrap.min.css
부트스트랩 적용
- 질문 목록을 출력할 때 부트스트랩을 적용시키고 싶다면?
질문 목록 템플릿 수정
[ .../resources/templates/question_list.html ]
➜ "bootstrap.min.css" 스타일시트를 사용할 수 있도록 상단에 링크 추가.
<link rel="stylesheet" type="text/css" th:href="@{/bootstrap.min.css}">
<div class="container my-3">
    <table class="table">
        <thead class="table-dark">
            <tr>
                <th>번호</th>
                <th>제목</th>
                <th>작성일시</th>
            </tr>
        </thead>
        <tbody>
            <tr th:each="question, loop : ${questionList}">
                <td th:text="${loop.count}"></td>
                <td>
                    <a th:href="@{|/question/detail/${question.id}|}" th:text="${question.subject}"></a>
                </td>
                <td th:text="${#temporals.format(question.createDate, 'yyyy-MM-dd HH:mm')}"></td>
            </tr>
        </tbody>
    </table>
</div>
🔻 loop.count
➜ 테이블 항목으로 추가한 번호를 표기.
🔻 #temporals.format
➜ Tymeleaf의 유틸리티로, 날짜를 형식에 맞춰 출력.
부트스트랩 참고 자료 - Get started with Bootstrap · Bootstrap v5.2 (getbootstrap.com)
Get started with Bootstrap
Bootstrap is a powerful, feature-packed frontend toolkit. Build anything—from prototype to production—in minutes.
getbootstrap.com
- 질문 상세 페이지도 부트스트랩을 적용하고 싶다면?
질문 상세 템플릿 수정
[ .../resources/templates/question_detail.html ]
<link rel="stylesheet" type="text/css" th:href="@{/bootstrap.min.css}">
<div class="container my-3">
<!-- 질문 -->
<h2 class="border-bottom py-2" th:text="${question.subject}"></h2>
<div class="card my-3">
<div class="card-body">
<div class="card-text" style="white-space: pre-line;" th:text="${question.content}"></div>
<div class="d-flex justify-content-end">
<div class="badge bg-light text-dark p-2 text-start">
<div th:text="${#temporals.format(question.createDate, 'yyyy-MM-dd HH:mm')}"></div>
</div>
</div>
</div>
</div>
<!-- 답변의 갯수 표시 -->
<h5 class="border-bottom my-3 py-2"
th:text="|${#lists.size(question.answerList)}개의 답변이 있습니다.|"></h5>
<!-- 답변 반복 시작 -->
<div class="card my-3" th:each="answer : ${question.answerList}">
<div class="card-body">
<div class="card-text" style="white-space: pre-line;" th:text="${answer.content}"></div>
<div class="d-flex justify-content-end">
<div class="badge bg-light text-dark p-2 text-start">
<div th:text="${#temporals.format(answer.createDate, 'yyyy-MM-dd HH:mm')}"></div>
</div>
</div>
</div>
</div>
<!-- 답변 반복 끝 -->
<!-- 답변 작성 -->
<form th:action="@{|/answer/create/${question.id}|}" method="post" class="my-3">
<textarea name="content" id="content" rows="10" class="form-control"></textarea>
<input type="submit" value="답변등록" class="btn btn-primary my-2">
</form>
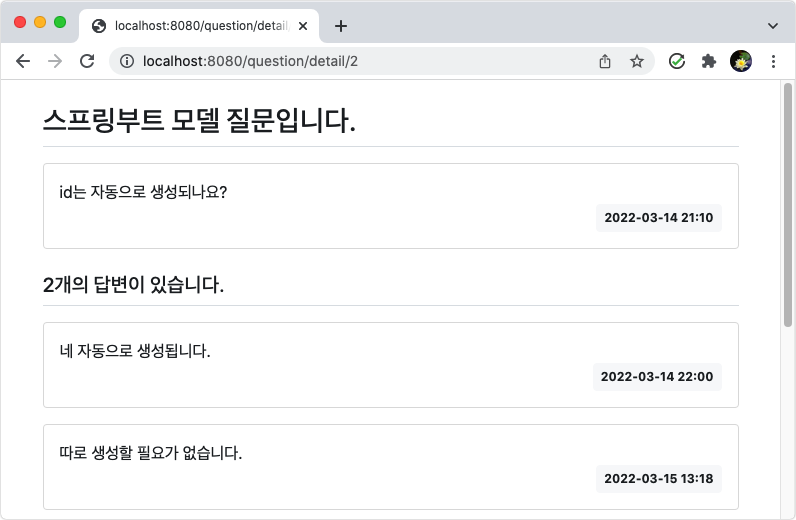
</div>🔻 질문이나 답변은 하나의 뭉치에 해당하므로 부트스트랩의 card 컴포넌트를 사용.
- 부트스트랩 적용으로 인해 style.css는 필요가 없어졌으므로 기존 내용은 모두 삭제하자.
- 부트스트랩을 적용한 질문 상세 화면
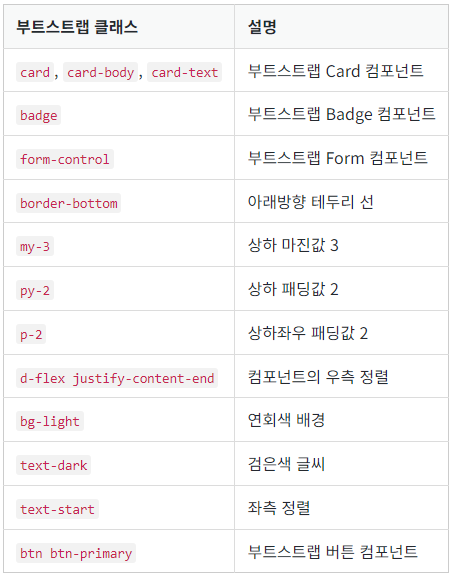
- 부트스트랩 클래스 설명
▼ 템플릿(Template) 상속
표준 HTML 구조
- 어떤 웹 브라우저를 사용하더라도 웹 페이지가 동일하게 보이고 정상적으로 작동 하게 하려면 반드시 웹 표준을 지키는 HTML 문서를 작성해야 한다 !
( 앞서 작성한 템플릿들은 표준 HTML 구조 X ) - 표준 HTML 문서의 구조는 아래의 예시 코드처럼 html, head, body 엘리먼트가 있어야 하며, CSS 파일은 head 엘리먼트 안에 링크 되어야 한다 !
또한 head 엘리먼트 안에는 meta, title 엘리먼트 등이 포함되어야 한다 !
<!doctype html>
<html lang="ko">
<head>
    <!-- Required meta tags -->
    <meta charset="utf-8">
    <meta name="viewport" content="width=device-width, initial-scale=1, shrink-to-fit=no">
    <!-- Bootstrap CSS -->
    <link rel="stylesheet" type="text/css" th:href="@{/bootstrap.min.css}">
    <!-- sbb CSS -->
    <link rel="stylesheet" type="text/css" th:href="@{/style.css}">
    <title>Hello, sbb!</title>
</head>
<body>
...
</body>
</html>
- 태그? 엘리먼트?
<table> ... </table> <!-- table 엘리먼트 -->
🔻 "<table>" 은 table 태그이고, 이러한 table 태그로 시작해서 table 태그로 닫힌 구간(Block)은 table 엘리먼트이다 !
템플릿 상속
- 앞에서 작성한 질문 목록, 질문 상세 템플릿을 표준 HTML 구조가 되도록 수정해야 하는데, 모두 그렇게 변경하면 body 엘리먼트 바깥 부분(head 엘리먼트 등)은 모두 같은 내용으로 중복된다 !
➜ CSS 파일이 수정될 때마다 모든 템플릿 파일을 수정해야 하는 문제 발생.
➜ 이것을 해결하기 위해 타임리프(Thymeleaf)는 템플릿 상속 기능을 제공 !
( 기본 틀이 되는 템플릿을 다른 템플릿에서 상속해 사용하는 방식 )
- 표준 HTML 구조의 기본 틀 - layout.html
[ /web-board/src/main/resources/templates/layout.html ]
<th:block layout:fragment="content"></th:block>
➜ "layout.html" 을 상속한 템플릿에서 개별적으로 구현해야 하는 영역
( 이 부분만 구현하면 표준 HTML 문서가 되는 것 ! )
<!doctype html>
<html lang="ko">
<head>
    <!-- Required meta tags -->
    <meta charset="utf-8">
    <meta name="viewport" content="width=device-width, initial-scale=1, shrink-to-fit=no">
    <!-- Bootstrap CSS -->
    <link rel="stylesheet" type="text/css" th:href="@{/bootstrap.min.css}">
    <!-- sbb CSS -->
    <link rel="stylesheet" type="text/css" th:href="@{/style.css}">
    <title>Hello, sbb!</title>
</head>
<body>
<!-- 기본 템플릿 안에 삽입될 내용 Start -->
<th:block layout:fragment="content"></th:block>
<!-- 기본 템플릿 안에 삽입될 내용 End -->
</body>
</html>
- "layout.html" 을 상속할 템플릿 - question_list.html, question_detail.html
( question_detail.html도 같은 방법으로 수정 )
[ /web-board/ src/main/resources/templates/question_list.html ]<link rel="stylesheet" type="text/css" th:href="@{/bootstrap.min.css}">
➜ 부모 템플릿인 layout.html 템플릿에서 이미 링크하고 있기 때문에 삭제.
<html layout:decorate="~{layout}">
➜ layout.hml 템플릿 상속
<html layout:decorate="~{layout}">
<div layout:fragment="content" class="container my-3">
    <table class="table">
        ...
    </table>
</div>
</html>
🔻 layout:decorate 속성
➜ 템플릿의 레이아웃(부모 템플릿)으로 사용할 템플릿을 설정.
🔻 layout:fragment="content"
➜ 부모 템플릿의 th:block 엘리먼트의 내용이 자식 템플릿의 div 엘리먼트의 내용으로 교체 !